Measure Soil Moisture Using Arduino

Written By - Saumya Upadhyay
Have you ever wondered how plants react when they're thirsty? What if your Arduino could hear their unspoken cries? With a soil moisture sensor, you can now tell if the soil is dry or wet using your Arduino. Isn't that exciting? No more guessing, just pure, sensor-driven plant maintenance! Are you prepared to assist your plants in staying hydrated?
Consider this: your Arduino functions as a plant's personal assistant, constantly monitoring soil moisture levels. It can transmit a signal to water the plants when they become too dry! No more over-or under-watering! Are you ready to use your Arduino to make this clever, green hydration system? Let's get started.
An overview of Soil Moisture Sensor
A Soil Moisture The sensor measures the amount of water in the soil, which aids in the monitoring of plant health. It is made up of two probes that measure the electrical resistance between them; dry soil has a high resistance, while moist soil has a low resistance. The sensor provides this information to a microcontroller (such as Arduino), which then performs operations like watering the plant. It is essential for automated irrigation systems, which ensure plants receive the proper amount of water, minimize overwatering or underwatering, and promote healthy plant growth. A Soil Moisture The sensor measures the amount of water in the soil, which aids in the monitoring of plant health. It is made up of two probes that measure the electrical resistance between them; dry soil has a high resistance, while moist soil has a low resistance. The sensor provides this information to a microcontroller (such as Arduino), which then performs operations like watering the plant. It is essential for automated irrigation systems, which ensure plants receive the proper amount of water, minimize overwatering or underwatering, and promote healthy plant growth.
Pin Diagram

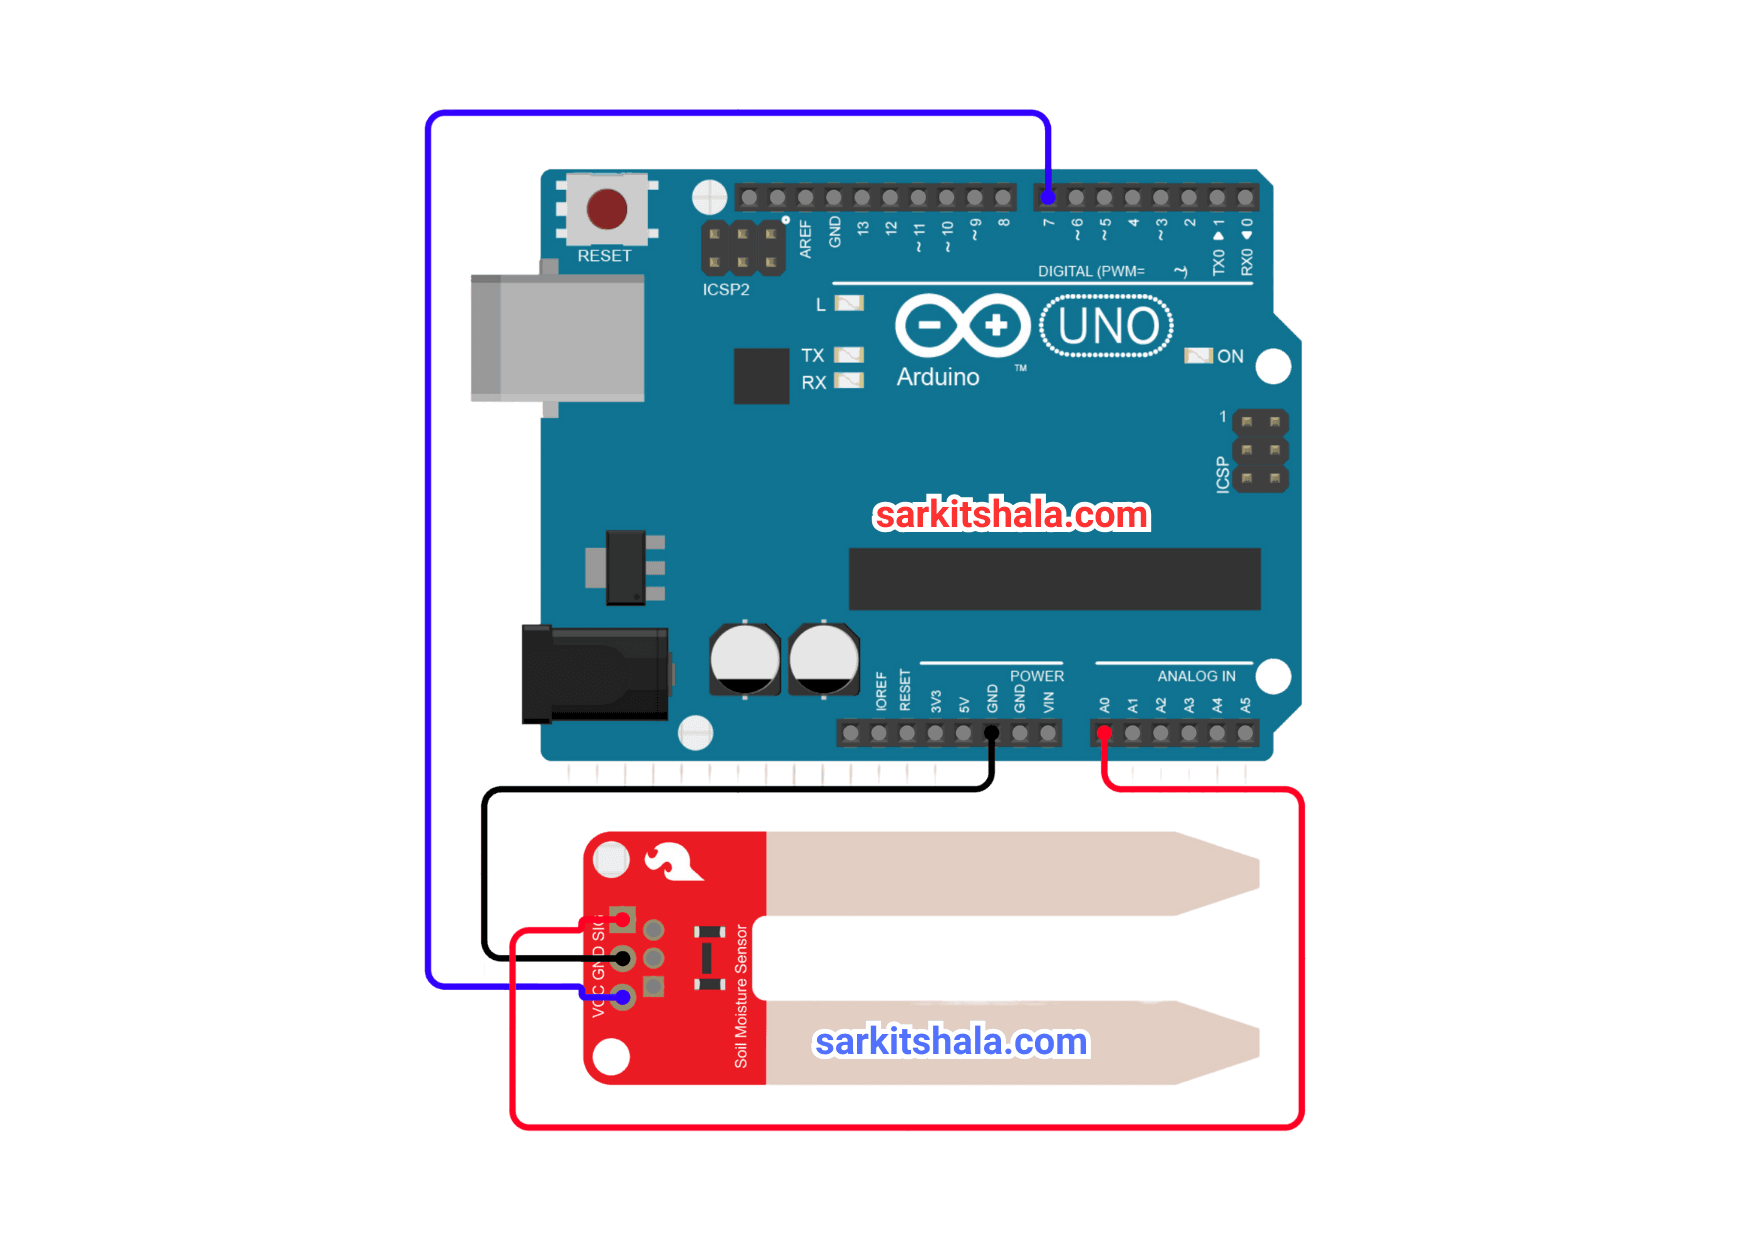
Circuit Diagram

Steps
1. Connect the Arduino's 5V pin to the soil moisture sensor's VCC pin, then ground the GND pin. Connect the Arduino's 5V pin to the soil moisture sensor's VCC pin, then ground the GND pin.
2. Connect the sensor's signal pin to an analog input pin on the Arduino, such as A0. Connect the sensor's signal pin to an analog input pin on the Arduino, such as A0.
3. Use an external power source or a USB cord to turn on the Arduino.
4. To read sensor values and utilize them to initiate actions, such as turning on a pump, write a simple piece of code. To read sensor values and utilize them to initiate actions, such as turning on a pump, write a simple piece of code.
Code
1
2 int sensor_pin=13;
3int sensor_state=1;
4void setup()
5{
6
7        pinMode(13,INPUT);
8        Serial.begin(9600);
9
10}
11void loop()
12{
13         Serial.print("Soil Moisture Level: ");
14         sensor_state = digitalRead(sensor_pin);
15         if (sensor_state == 1)
16         {
17            Serial.println("Wet");
18          }
19         else
20         {
21            Serial.println("Dry");
22           }
23          delay(200);
24}
25