Interfacing Obstacle Avoidance Sensor with Arduino
Obstacle Avoidance Sensor
An obstacle avoidance sensor is used in robotics to detect obstacles in the path of the robot. It uses infrared (IR) technology to sense objects in proximity and helps the robot avoid collisions by providing real-time feedback on the environment. The sensor is commonly used in autonomous robots, vehicles, and other automation systems.
How Obstacle Avoidance Sensor Works
The obstacle avoidance sensor uses infrared light to detect obstacles. The sensor consists of an emitter and a detector. The emitter sends out infrared light, and the detector receives the reflected light. If an obstacle is detected, the sensor sends a signal to the microcontroller (Arduino), indicating that the path is blocked.
Wiring the Obstacle Avoidance Sensor to Arduino
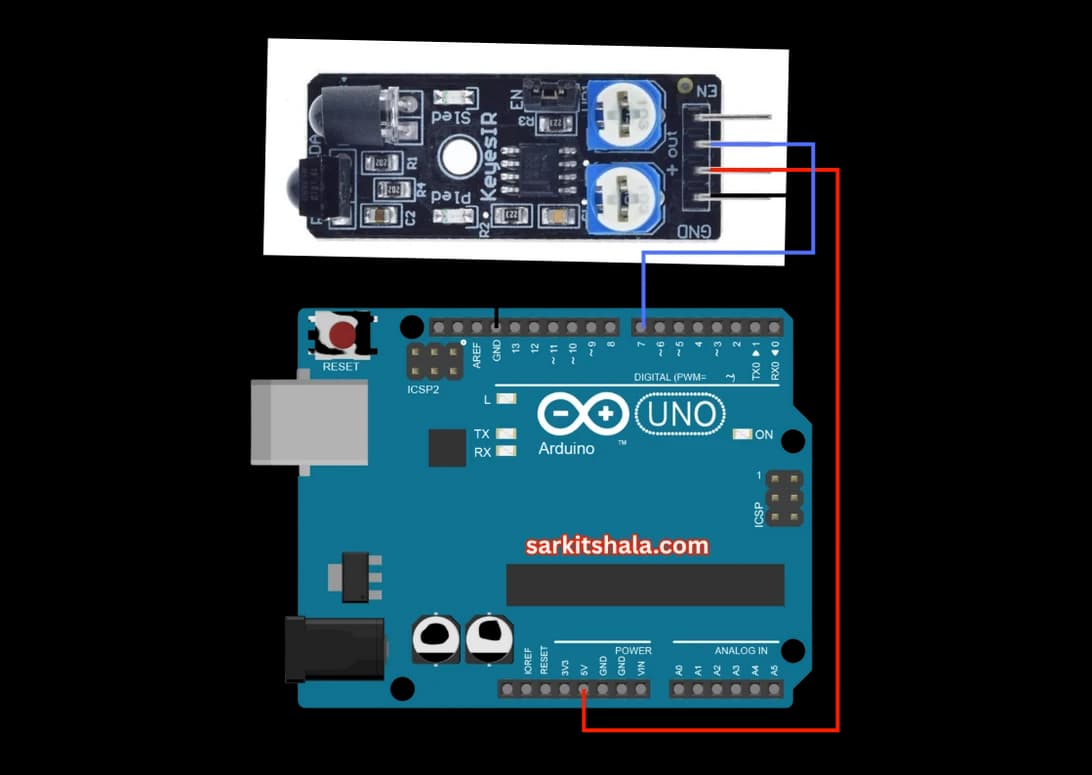
To connect the obstacle avoidance sensor to the Arduino, connect the VCC and GND pins to +5V and GND on the Arduino. For an IR sensor, connect the OUT pin to a digital input pin. For an ultrasonic sensor, connect the Trig and Echo pins to digital output and input pins respectively.
Types of Obstacle Avoidance Sensors
Active Infrared Sensor
- The sensor emits infrared light.
- Detects the reflected infrared light from nearby obstacles.
- Signals the Arduino when an object is detected.
Ultrasonic Sensor
- The sensor emits ultrasonic pulses.
- Measures the time taken for the pulse to return.
- Calculates the distance to the obstacle.
Pin Configuration of Obstacle Avoidance Sensor
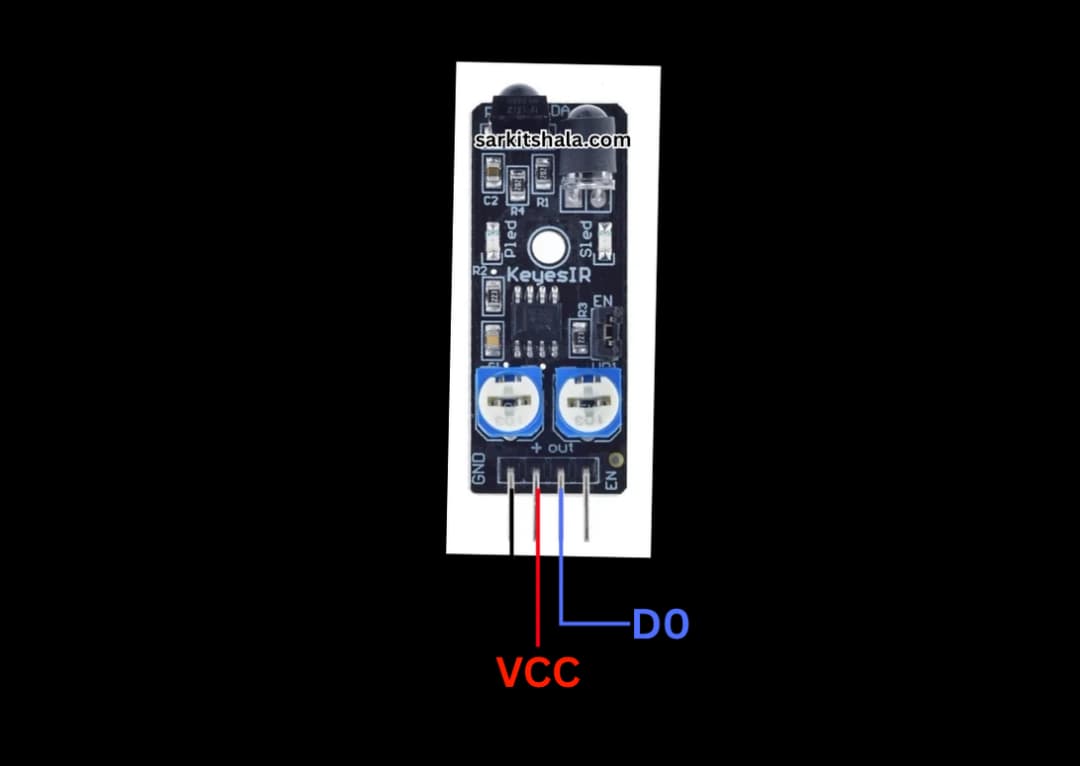
Obstacle Avoidance Sensor (IR)
- VCC: Connect to +5V on Arduino.
- GND: Connect to GND on Arduino.
- OUT: Connect to a digital input pin (D2).
Ultrasonic Sensor
- VCC: Connect to +5V on Arduino.
- GND: Connect to GND on Arduino.
- Trig: Connect to a digital output pin (D9).
- Echo: Connect to a digital input pin (D10).
Algorithm
Initialize Components
- Connect the VCC and GND pins of the sensor to +5V and GND on the Arduino.
- For the IR sensor, connect the OUT pin to a digital input pin (D2).
- For the ultrasonic sensor, connect the Trig and Echo pins to the specified digital pins (D9 and D10).
Write the Code
- Set the sensor pin (OUT or Echo) as INPUT in the setup() function.
- For ultrasonic sensors, set the Trig pin as OUTPUT and Echo pin as INPUT.
- Read the sensor values in the loop() function and take appropriate action if an obstacle is detected.
Detect Obstacles
- Use a condition to check whether the sensor detects an obstacle (e.g., if OUT pin is HIGH for IR sensors).
- For ultrasonic sensors, calculate the distance and detect obstacles if the distance is below a threshold.
Control Robot Movements
- If an obstacle is detected, the Arduino can control the motors or other actuators to avoid the obstacle (e.g., turning or stopping).
Test the Project
- Upload the code to the Arduino and test the sensor by placing objects in front of it.
- Observe how the robot or system responds to obstacles and adjust the program if needed.
Arduino Code
1// Arduino Obstacle Avoidance Sensor: Wiring & Code Guide
2// This code reads the digital signal from an obstacle sensor and detects nearby objects
3
4const int sensorPin = 7;  // Connect OUT pin of sensor to pin 7
5
6void setup() {
7  pinMode(sensorPin, INPUT);     // Set sensor pin as input
8  Serial.begin(9600);            // Start serial communication
9  Serial.println(\"Obstacle Sensor Ready\");
10}
11
12void loop() {
13  int sensorState = digitalRead(sensorPin); // Read sensor output
14
15  if (sensorState == LOW) {
16    Serial.println(\"Obstacle Detected!\");
17  } else {
18    Serial.println(\"Path Clear\");
19  }
20
21  delay(500);  // Delay for readability
22}
Applications
- Robotic cars for collision avoidance
- Autonomous drones and robots
- Automated guided vehicles (AGVs)
- Smart home systems
- Security systems with motion detection
- Smart toys and interactive systems
Conclusion
Interfacing an obstacle avoidance sensor with Arduino is a simple yet essential skill for building autonomous robots and other applications that require real-time environmental interaction. By using infrared or ultrasonic sensors, you can detect obstacles and take action accordingly. This project serves as a foundation for more advanced robotics and automation systems.