Interfacing Laser Sensor with Arduino

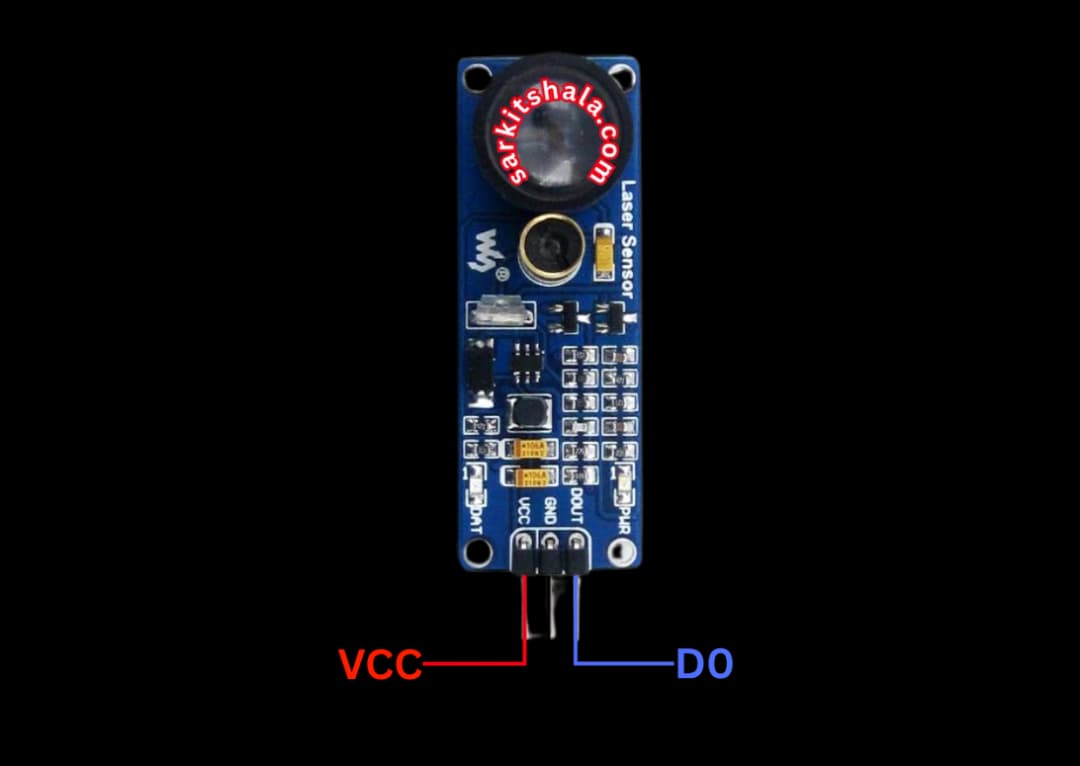
Laser Sensor
A laser sensor is a device that uses laser light to detect the presence or distance of objects. It works by emitting a laser beam and measuring the time it takes for the beam to reflect off a surface and return to the sensor. Laser sensors are widely used in industrial applications for precision measurements.
Laser Sensor Working Principle
The laser sensor works on the principle of time-of-flight (ToF). It emits a laser pulse towards an object and then measures the time it takes for the pulse to bounce back to the sensor. The distance is calculated using the speed of light and the time it takes for the reflection to return.
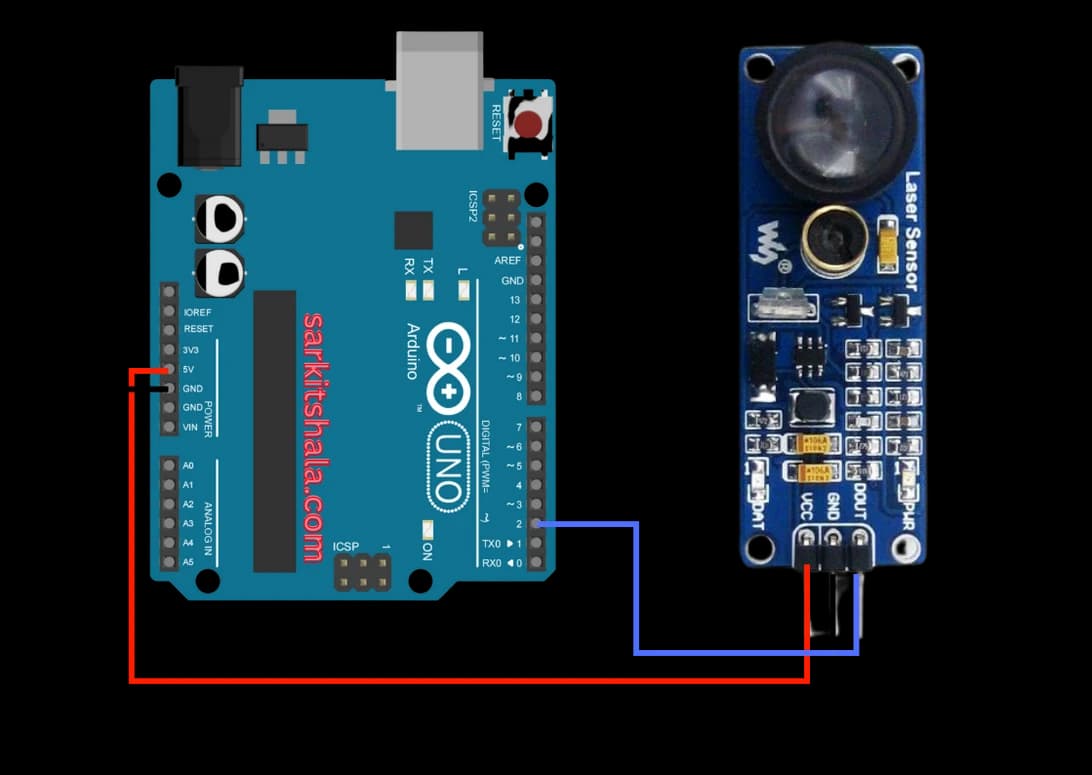
Wiring the Laser Sensor to Arduino
To connect the laser sensor to the Arduino, connect the VCC and GND pins to +5V and GND on the Arduino. For a distance sensor, connect the signal pin to an analog input pin. For a proximity sensor, connect the OUT pin to a digital input pin on the Arduino.
Types of Laser Sensors
Time-of-Flight (ToF) Sensor
- Emits a laser pulse.
- Measures the time taken for the pulse to return.
- Calculates the distance based on the speed of light.
Laser Proximity Sensor
- Emits continuous laser light.
- Detects objects when the laser light is reflected back.
Pin Configuration of Laser Sensor
Laser Distance Sensor
- VCC: Connect to +5V on Arduino.
- GND: Connect to GND on Arduino.
- Signal: Connect to an analog or digital input pin on Arduino.
Laser Proximity Sensor
- VCC: Connect to +5V on Arduino.
- GND: Connect to GND on Arduino.
- OUT: Connect to a digital input pin (D2).
Algorithm
Initialize Components
- Connect the VCC and GND pins of the laser sensor to +5V and GND on the Arduino.
- Connect the signal or OUT pin to an analog or digital input pin on the Arduino.
Write the Code
- Set the sensor pin as INPUT in the setup() function.
- Read the sensor's analog or digital values in the loop() function.
- Use these values to calculate distance or detect proximity.
Display Values or Control Devices
- Print the sensor readings to the serial monitor.
- Use the readings to trigger devices such as motors or LEDs based on distance.
Test the Project
- Upload the code to the Arduino.
- Test the sensor by moving objects closer and farther to see the change in readings.
Arduino Code
1// Arduino Laser Sensor: Wiring & Code Guide
2// This code reads input from a digital laser sensor and prints object detection status
3
4const int laserSensorPin = 2;  // Digital pin connected to laser sensor output
5
6void setup() {
7  pinMode(laserSensorPin, INPUT); // Set laser sensor pin as input
8  Serial.begin(9600);             // Start serial communication
9  Serial.println(\"Laser Sensor Interface Ready\");
10}
11
12void loop() {
13  int sensorState = digitalRead(laserSensorPin); // Read sensor output
14
15  if (sensorState == LOW) {
16    Serial.println(\"Object Detected!\");
17  } else {
18    Serial.println(\"No Object Detected\");
19  }
20
21  delay(500);  // Delay for stability
22}
Applications
- Distance measurement and sensing
- Object detection and proximity sensing
- Speed and motion detection
- Robotics for obstacle avoidance
- Automated manufacturing systems
- Laser scanners and 3D imaging
Conclusion
Interfacing a laser sensor with Arduino allows you to easily measure distances or detect objects with precision. Laser sensors are widely used in robotics, automation, and measurement systems. By using the simple wiring and code structure, you can incorporate laser sensing capabilities into your DIY projects.